
Where to begin
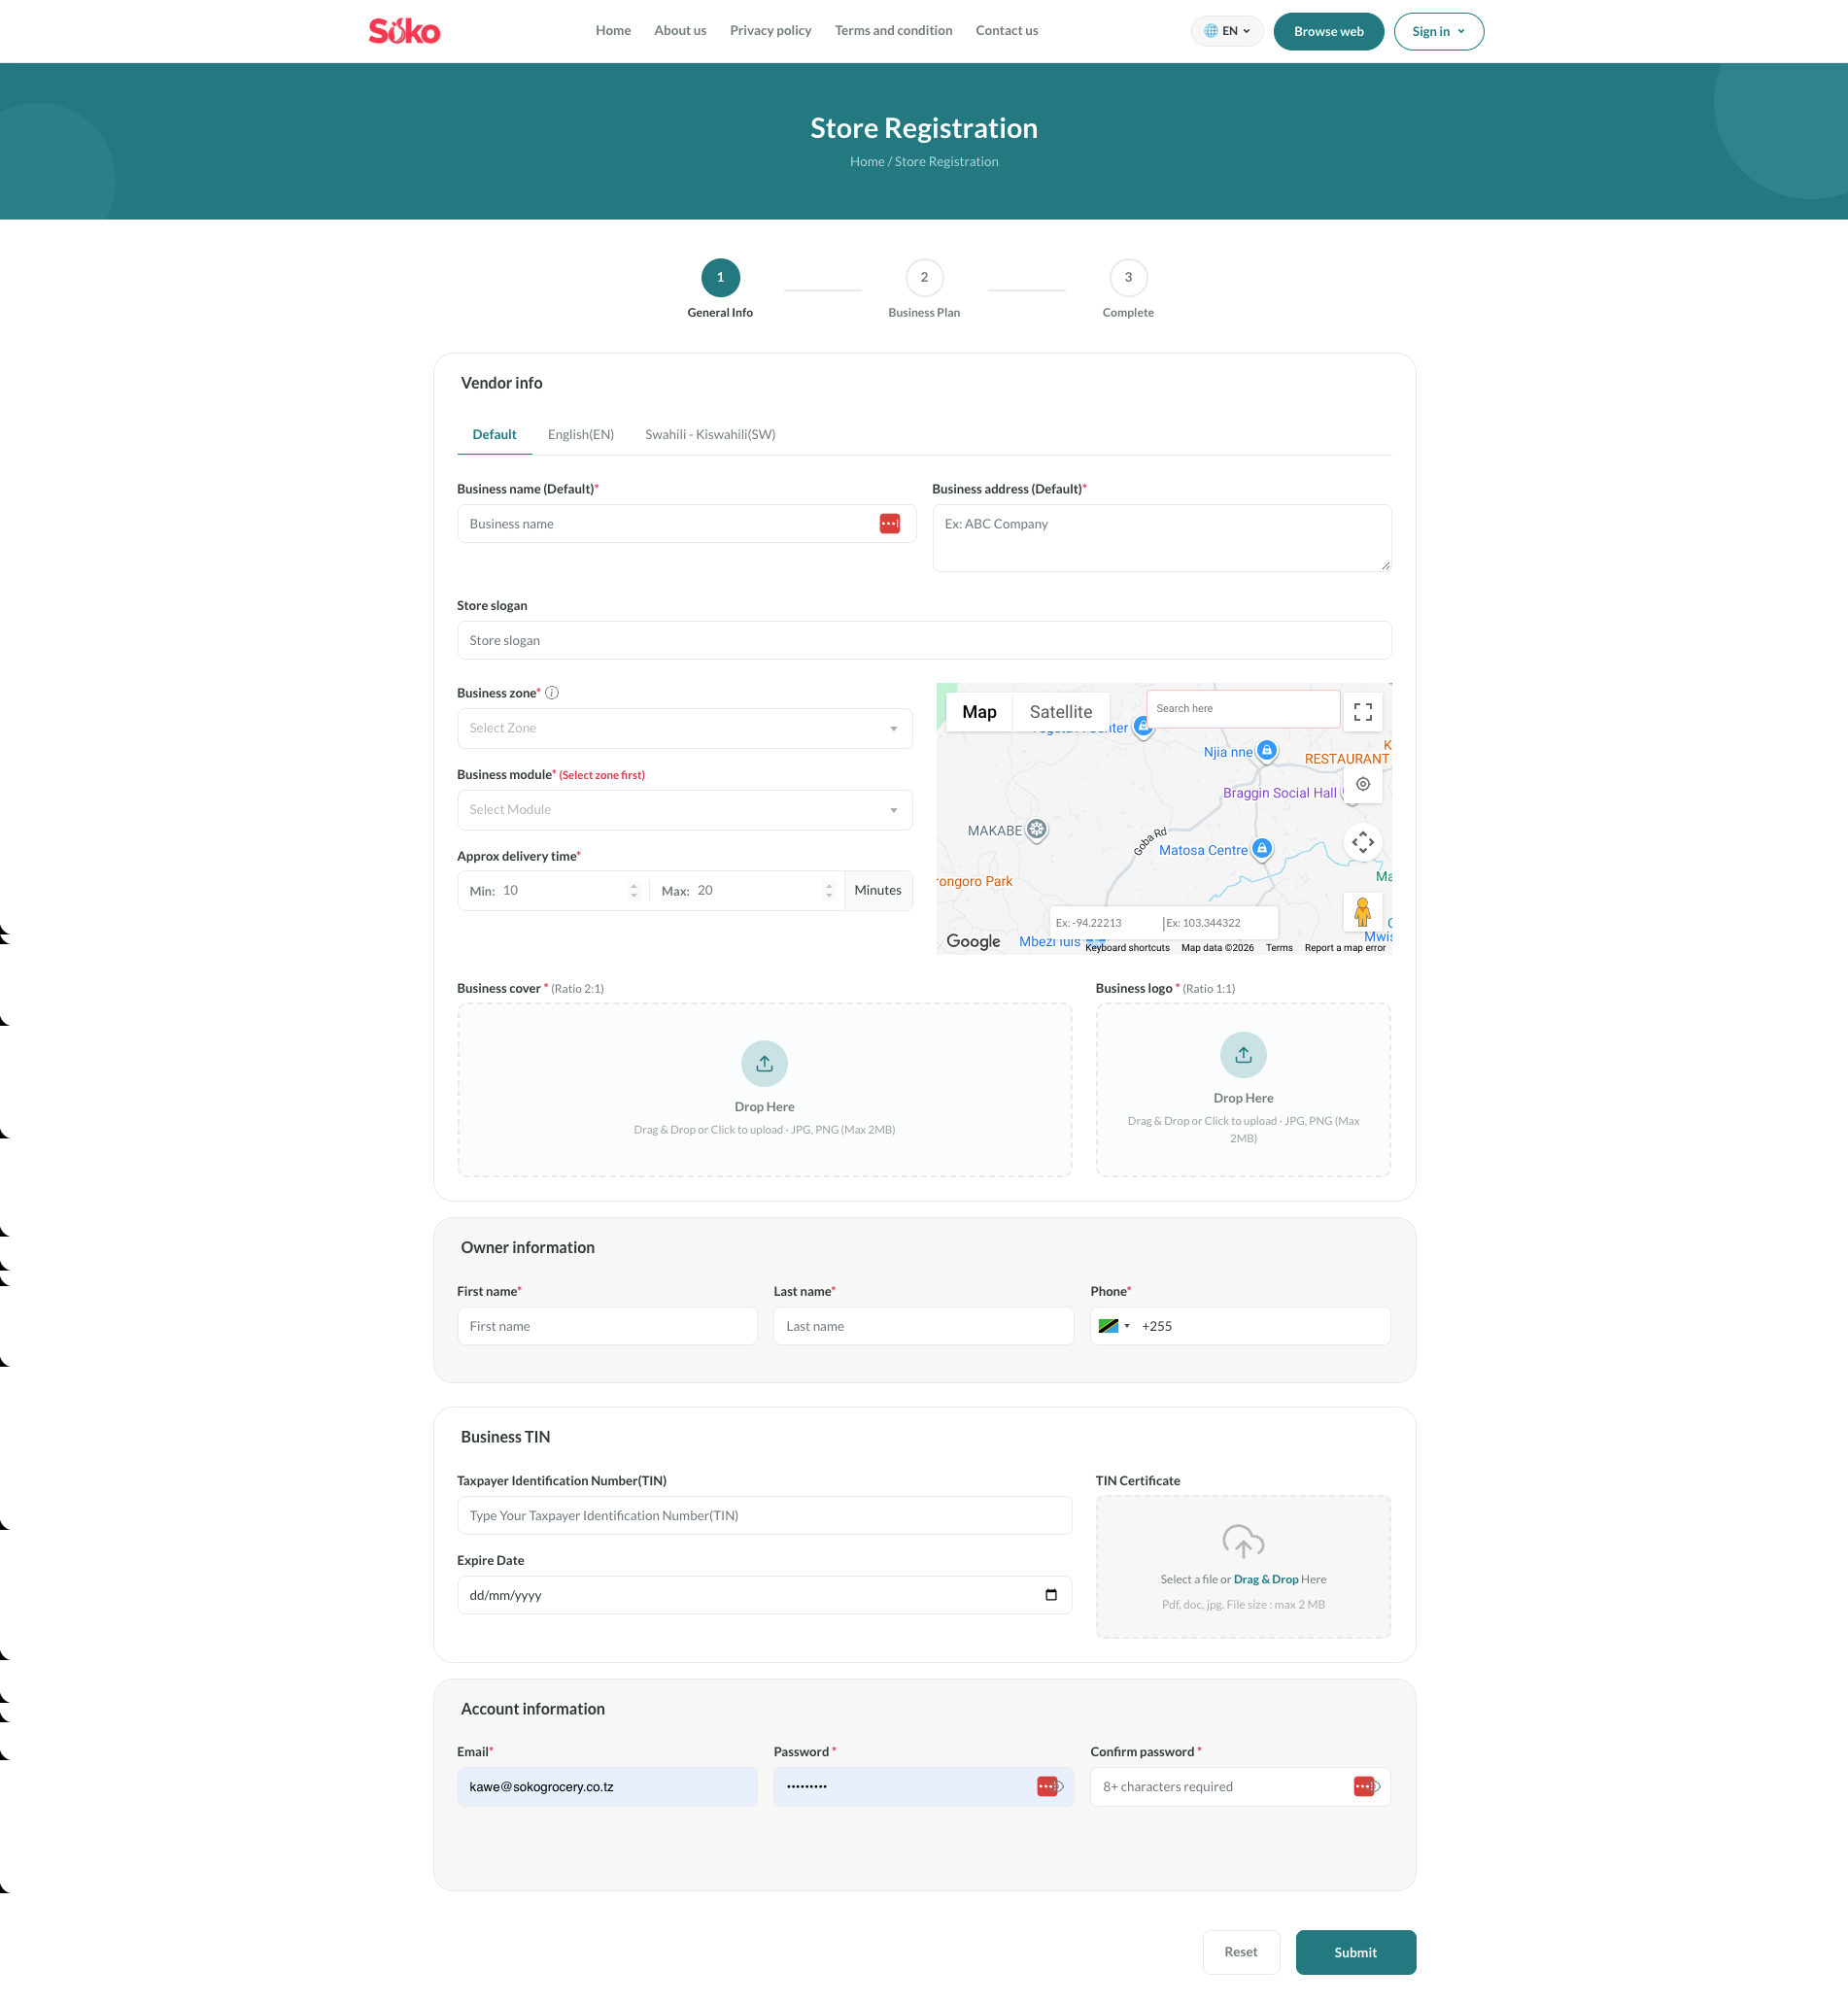
The Soko vendor portal is the simplest starting point. Choose Join as a Vendor. It also provides vendor and employee login links and app information.
You can also reach vendor registration through the Soko customer website, the customer app’s vendor-registration entry, or the registration option in the Soko Store app. These routes serve the same purpose: applying to operate your store on Soko. Use one application for your first store rather than submitting duplicates through each channel.
Choose the right starting point
You do not need to install every Soko app to register. Start from the portal in your phone or computer browser if that is most comfortable. The customer website/app is where people buy; the vendor dashboard and Soko Store are where your team manages the shop. Soko Delivery is for your riders.
Registration creates your application and account details. Approval, subscription and setting up the shop are separate steps. Keep the phone and email you apply with available so you can follow up without creating a second application.
Have these ready
- Your store’s trading name, address, working contact number and a short slogan if you use one.
- Your location on the map and the business zone that contains it.
- The correct store category: grocery, pharmacy or cosmetics, as offered for your zone.
- A square store logo and a wide cover image. The web form requests a 1:1 logo and 2:1 cover, with JPG/PNG guidance and a 2 MB upload limit shown there.
- The owner’s first name, last name and phone number, plus an email and password for the account.
- TIN information and supporting documents if the application displays those fields. Complete any additional requested business information using your actual records.
A clear photo of the store frontage can work as a cover. Avoid tiny text inside the logo; it needs to remain recognisable on a phone.
Complete the application
- Open registration and enter the store information.
- Select the zone before the business category. Place the map pin inside the selected zone at your shop’s real pickup location.
- Add the logo, cover, owner details and account details.
- Complete the package or payment steps presented by the registration flow, and check the application before submitting.
- Follow the application status and any review instructions. Submission alone does not mean the store is approved and visible.
- After access is granted, sign in as the vendor and complete the launch checklist.
Vendor login and employee login
The owner uses Store login. Staff use Store employee login with accounts the store has created for them. A rider uses the delivery app with the rider account you add to the store. These are different accounts with different responsibilities.
If your shop is already registered, use login or password recovery. If you are adding a second location, use branch management from the existing vendor account.
If registration will not continue
Check required fields, image size, password confirmation, whether the pin is inside the zone, and whether your selected category is available there. If the email or phone is already registered, check for an existing account. For unresolved problems, use Soko support and describe the step and error shown.