
Choose salary-based or freelancer
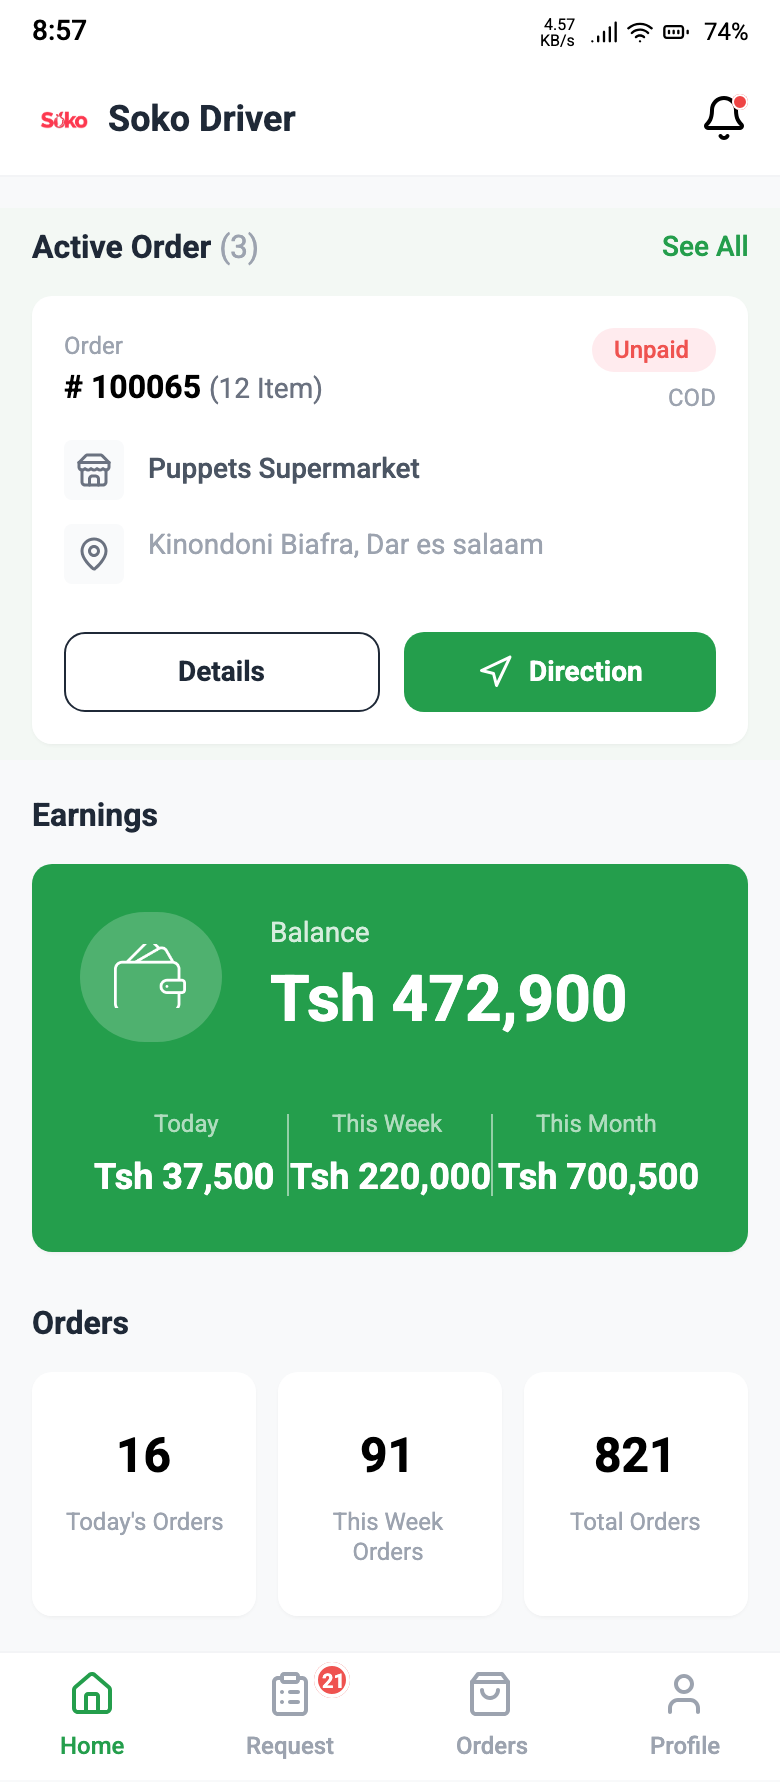
Your store adds its own delivery people and manages their work. Before you begin accepting delivery orders, create the account for at least one person who is ready to deliver, help them sign in and agree how you will assign their first order. You can start with the bodaboda you already use.
You can add unlimited delivery people, choosing the number that fits your orders and their availability. Each account is connected to the store or branch where it is created. Add more people when you need cover for breaks, busy periods or a rider who is unavailable.
Scroll sideways to compare all columns.
| Rider type | Simple explanation | What happens to the delivery fee |
|---|---|---|
| Salary Based | You employ the person and pay an agreed salary. Useful for regular delivery cover. | The customer’s delivery fee is credited to your store. You handle the employee’s salary separately. |
| Freelancer | You work with the person per delivery without employing them on a salary, such as a bodaboda you call for trips. | The customer’s delivery fee is credited as the rider’s delivery earnings. Agree how the fee and customer collections are settled. |
You can use either type or a mixture of both. Select the correct type for each person when adding their account. More available riders can reduce waiting at the shop; prompt, reliable deliveries give customers a reason to order from you again.
Agree the rider’s working hours, availability, cash return and any store-funded free-delivery arrangements before the first trip. Do not promise a rider their normal fee from a free-delivery promotion without agreeing who funds it.
Add a rider in the dashboard
- Select the correct branch.
- Open Deliveryman/Delivery person → Add new.
- Enter first and last name, phone, email and the account password/confirmation.
- Select the identity type, enter the identity number and upload the requested identity images and profile photo.
- Select salary-based or freelancer/earning type to match the actual arrangement.
- Save and check the rider’s active status and record in the list.
Use the rider’s real contact information. The rider is connected to the store/branch where you create the account; do not assume one branch’s rider is automatically available in every branch.
Add or update a rider in Soko Store
Open the Deliveryman area, choose Add delivery man, enter the same identity/contact/account details and select Earning type: Salary based or Freelancer. Save. Open an existing rider’s details to review or edit the available information and status.
The list/detail screens help you inspect rider records and available transaction information. When a rider stops working with you, review outstanding deliveries and cash before disabling access.
The rider’s first sign-in
Use the delivery app information available through the vendor portal. Give the rider the account details you created. They sign in to Soko Delivery, permit the required location and notification access, and make themselves available through the app’s active/online control.
Explain that being online does not mean an order is already assigned. Have the store demonstrate one order from assignment to completion.
Pickup to doorstep
- The store assigns the order in its order details. The rider opens the notification or assigned-order list.
- The rider checks the store/pickup information, order number, customer location, contact and payment details.
- At the store, match the packages to the order and confirm any change or collection instructions. Do not mark pickup while still travelling to the shop.
- Use the delivery app’s pickup action when the packages have actually been collected. The order moves to picked up/out for delivery.
- Use the customer address/map and contact options to complete the journey. Call if the pin or landmark needs clarification.
- At the customer, check the recipient and collect only the unpaid amount. For paid orders, do not collect the order total again.
- Complete delivery using the app’s action and any required verification code. Then reconcile collections with the store.
Delivery verification code, when enabled
The delivery code helps confirm the correct recipient and avoids accidental completion. The customer can find Delivery verification code in that order’s details in the Soko customer app; the customer website also presents order verification information where enabled.
Tell the customer: “Please open Soko, go to My orders, open this order and look for Delivery verification code. Share it with me when I hand you the order.”
The rider enters the code in the delivery verification screen. A wrong or missing code is rejected when verification is required. Ask for the code only at the handover, not before reaching the customer. If they cannot find it, confirm they opened the correct order/account, refresh the order details and contact the store or support if necessary. Do not guess the code or mark another order delivered.
If a delivery cannot be completed
- Recheck the order number, address and customer contact before assuming the location is wrong.
- Use the contact option to ask the customer for the missing landmark or handover details. Keep the store informed of the delay.
- If the customer is unavailable or declines the order, contact the store for instructions. Keep the order at its real stage; it has not been delivered.
- The store should agree the next action with the customer and contact support where cancellation or payment resolution is needed.
- Account for returned goods and any money already collected using the same order number. Do not create a second collection or completion entry to hide the first problem.
Give your rider this simple rule: “Check the order, collect the right amount, hand over the goods, then record completion.” The app helps keep a shared record, while your agreement with the rider governs cash return and payment for the trip.
Close the cash loop
Use the order number to reconcile money collected, the rider’s delivery fee and any cash returned to the store. A direct mobile-money transfer to the shop should be verified in the shop’s own account. Review wallet balances alongside your physical cash and mobile-money records.